WorkOutDoors |
|
WorkOutDoors |
|
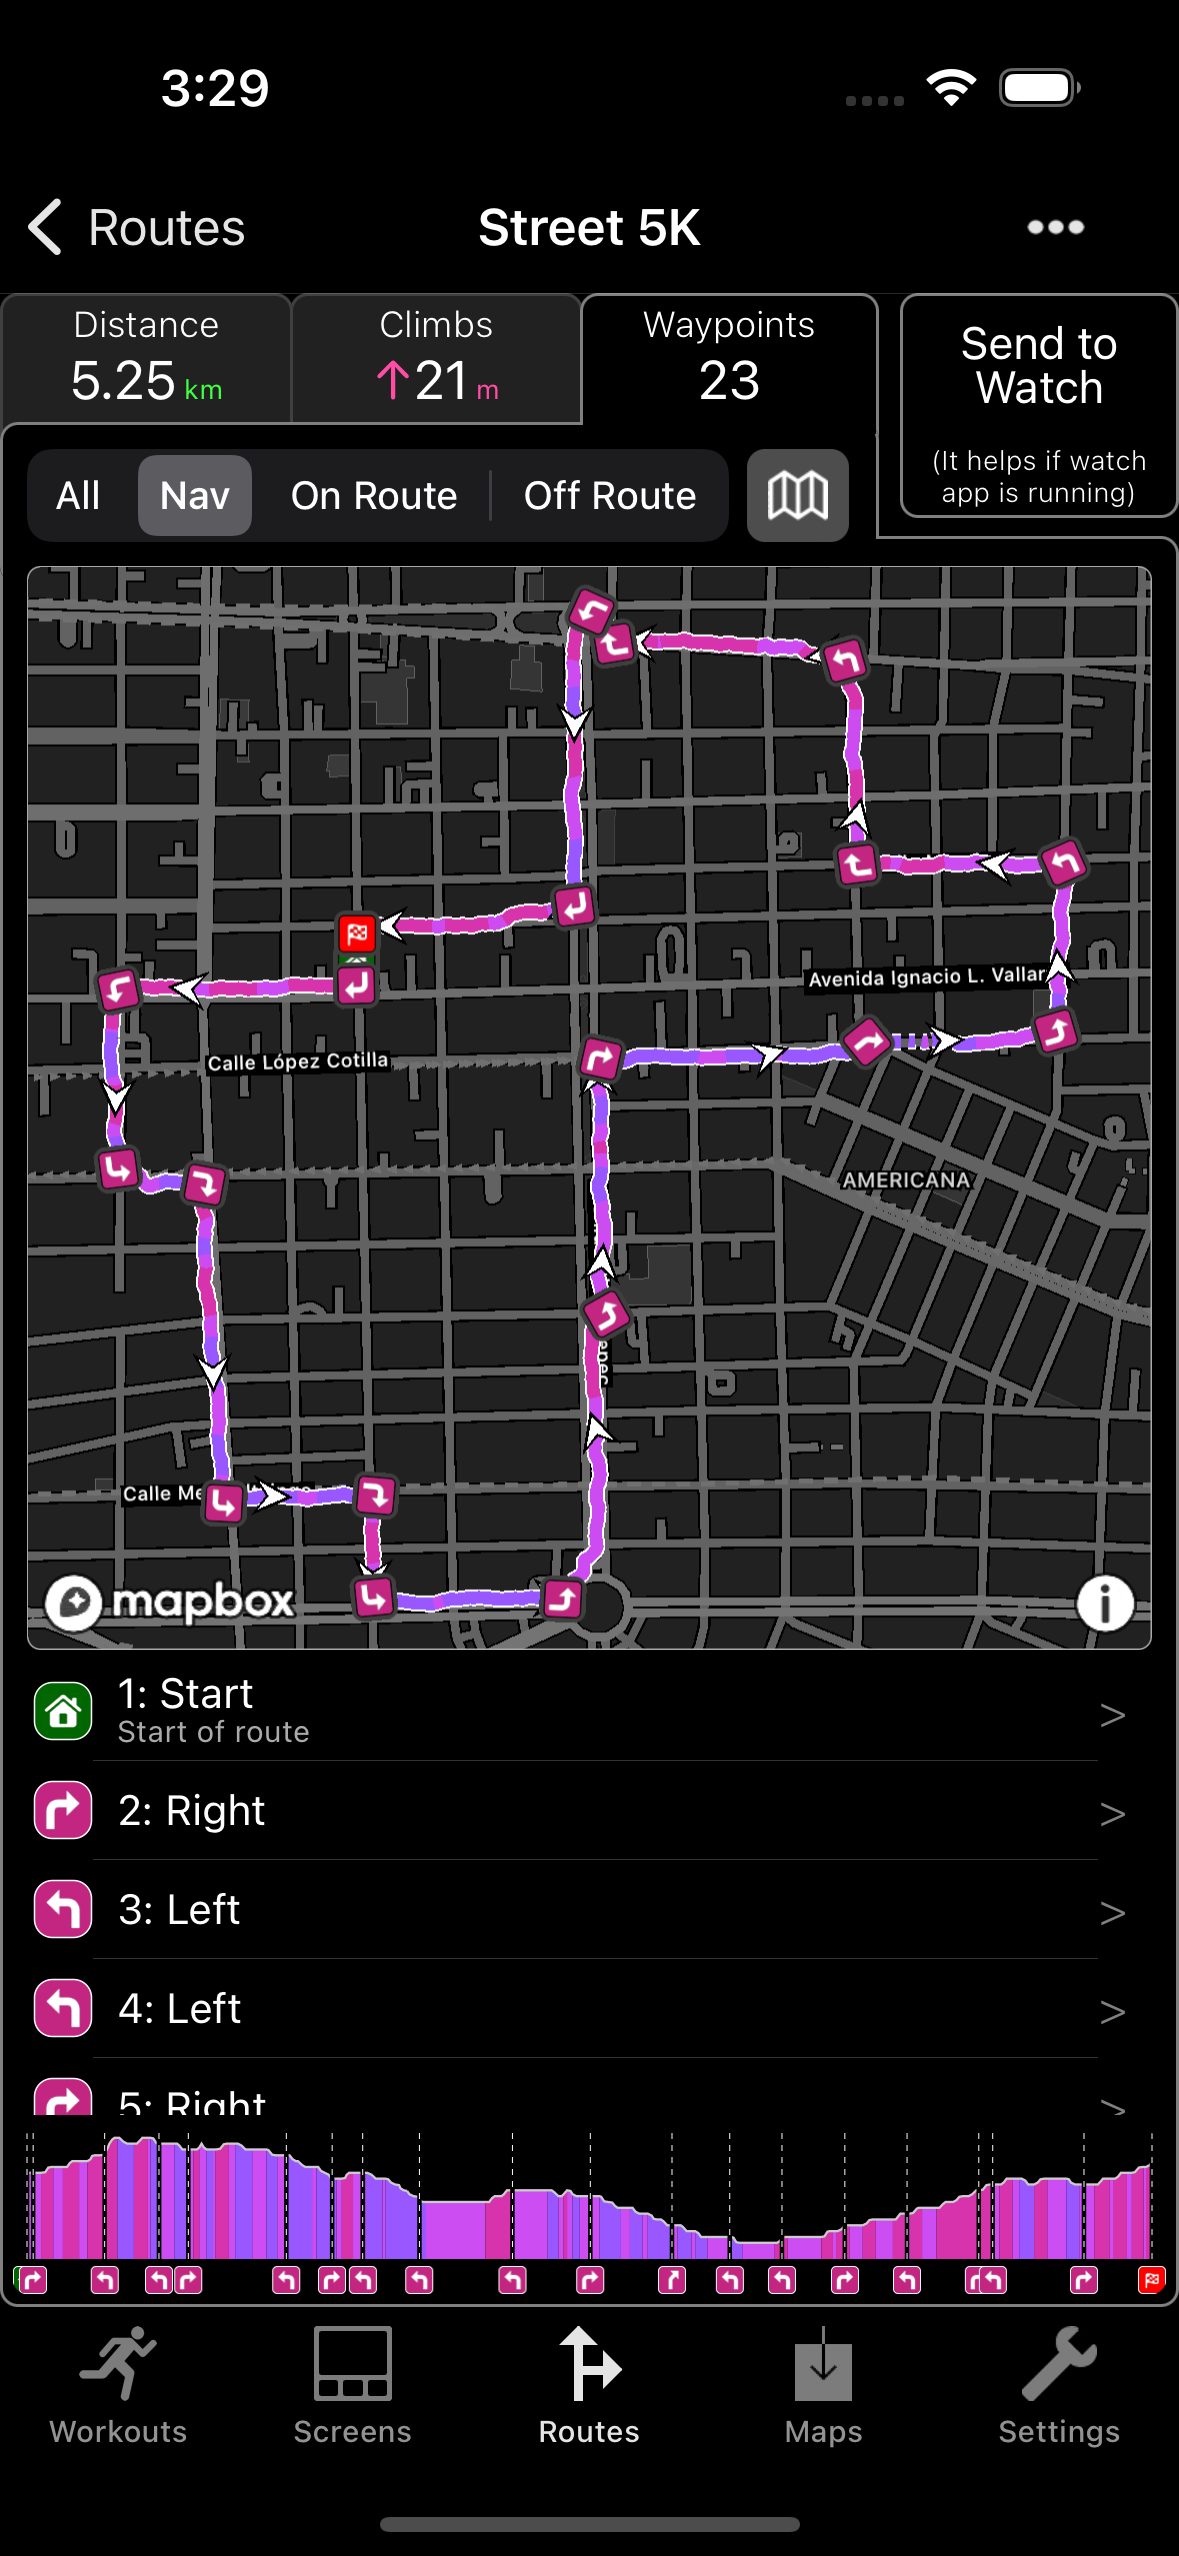
WorkOutDoors provides many navigation features, as described in the Maps section. However you can get even more functionality by loading a file with a route to follow. These extra features include Waypoints, Turn-by-Turn Directions, and Climb Detection.
Routes can be loaded from GPX, TCX or FIT files. Either share them from another app (e.g. Mail or Safari) or save in the Files app and then go to the Routes tab and tap Import.
A route can also be created from a previous workout by tapping Export then Create Route.
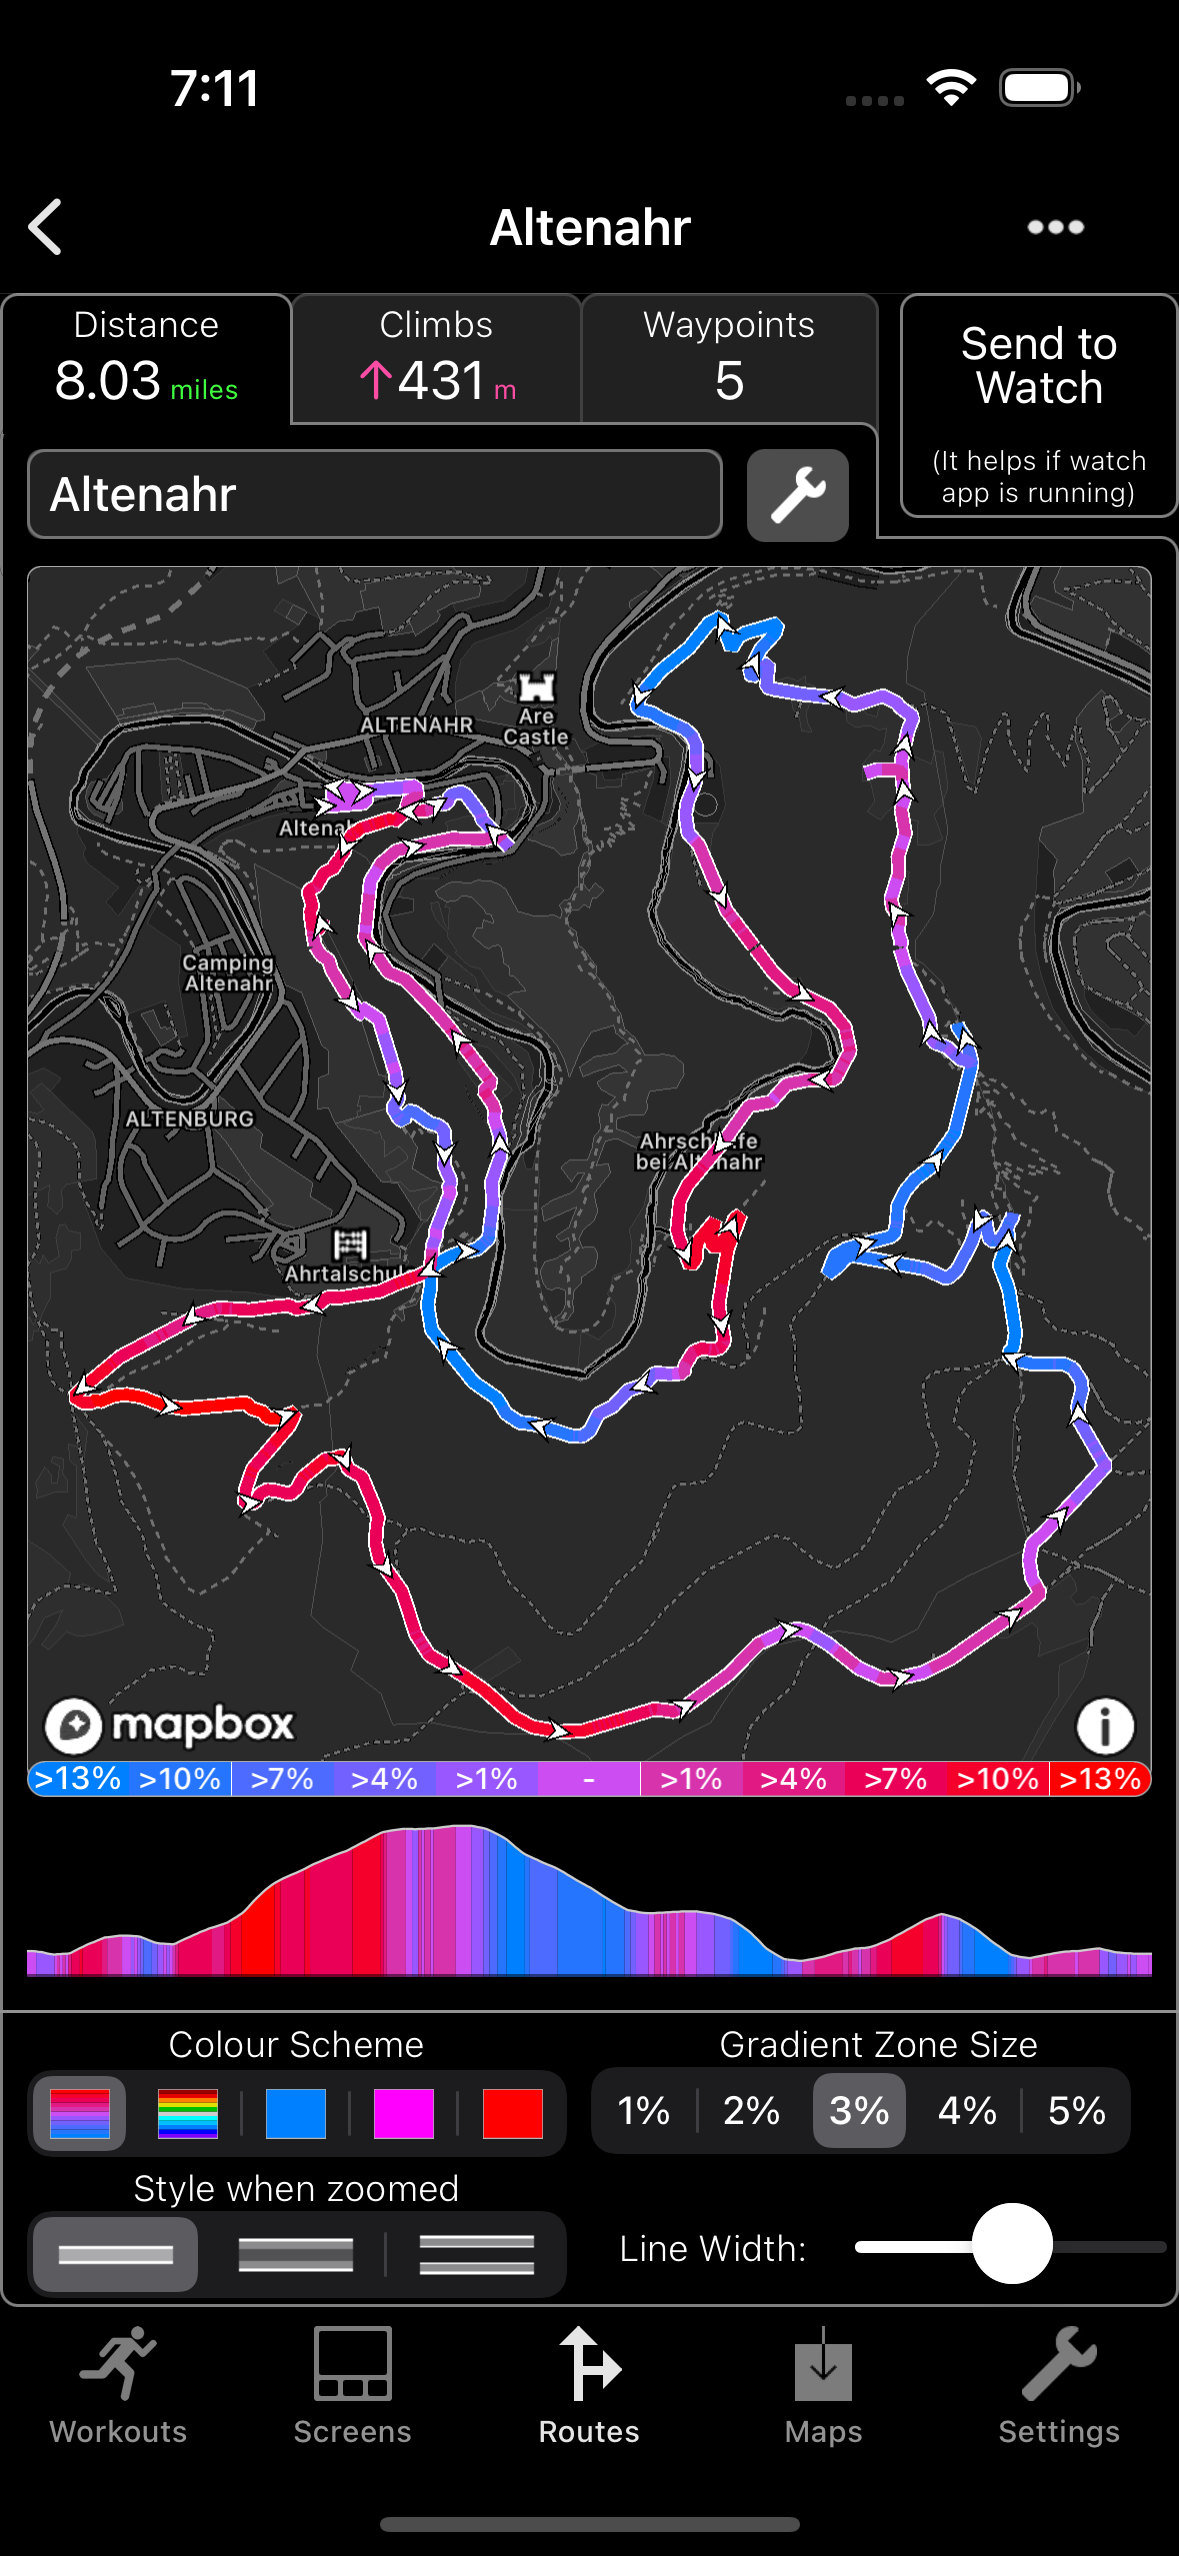
You can export a route as a GPX, TCX or FIT file by tapping the '...' button in the top left.
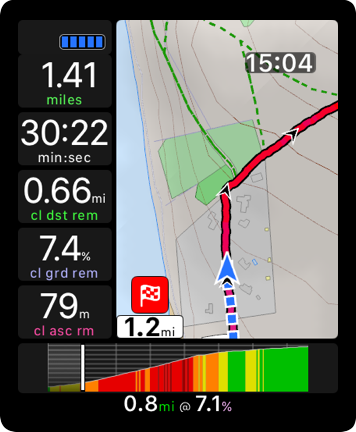
Touch the profile below the map to see the distance, elevation and gradient at any point. Move your finger left or right to scroll through the route.
To change the theme tap the Spanner icon. The default colours are shades of purple from blue for steep downhill to red for steep uphill. Or you could use a rainbow of colours or just a single colour.
You can control the width of the line and also how it looks when zoomed in. For example make it hollow or transparent so that you can see the underlying trail.
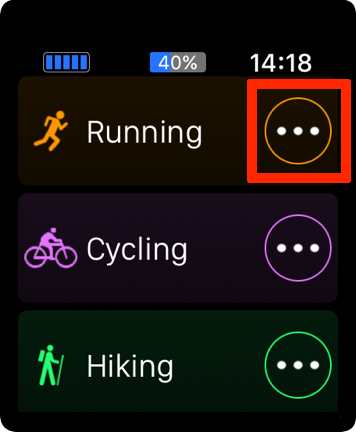
To select a route when starting a workout tap the circular '...' button, then tap 'Navigate' and then 'Route'. At any other time go to the Settings and then tap Routes.
At any time you can reverse the route, deselect it or choose a different route in the Settings.
When a route is selected then the Route Screen is shown. The standard screens are also available by swiping left or right.
To configure or hide the route screen go to the Screens settings or the Route settings.
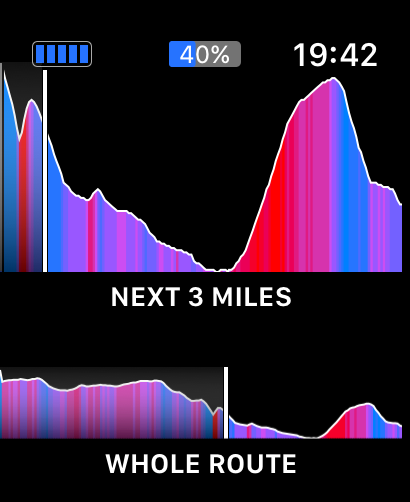
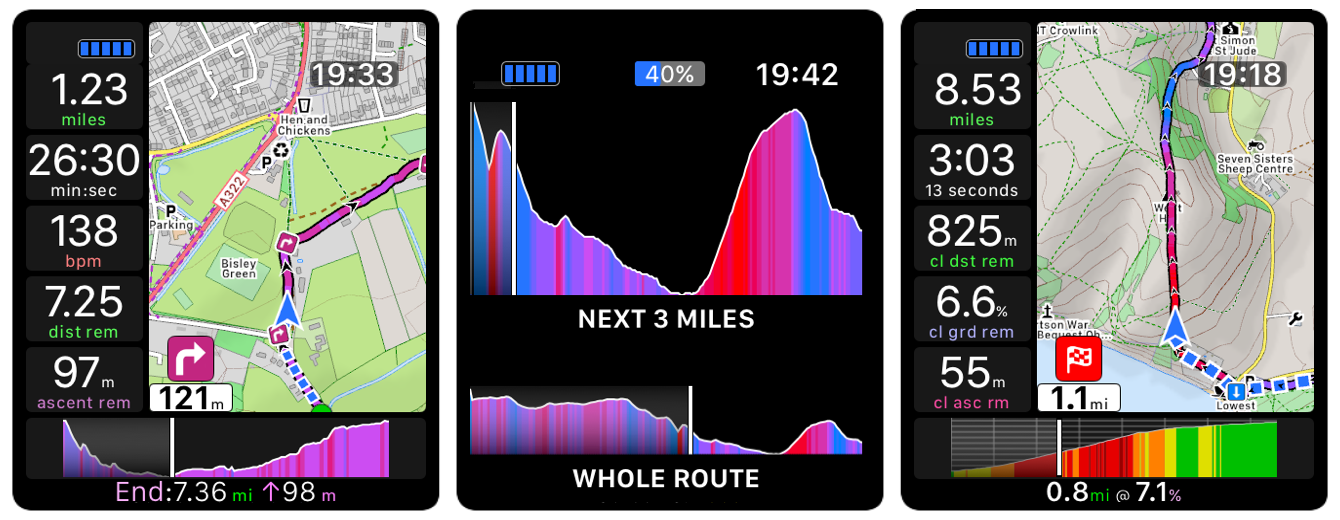
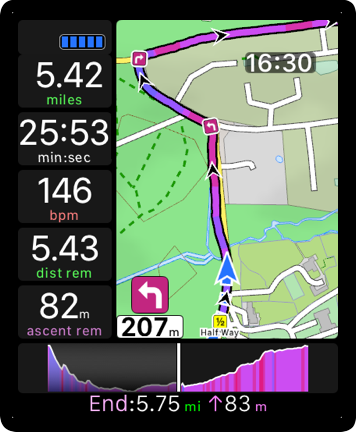
A profile of the route is shown at the bottom of the screen. Tap this to see a full screen profile for the upcoming 5 km / 3 miles.
Or you could configure the route screen to show the upcoming profile instead of the whole route.
The app will alert you when you leave or rejoin the route, or when you are going backwards.
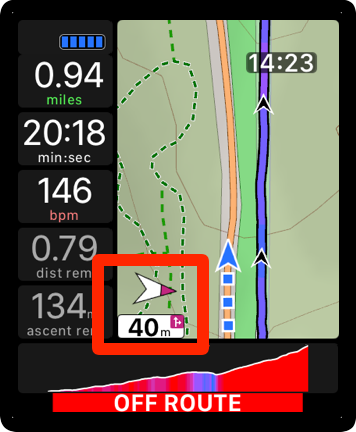
When you are off-route the corner of the map will display a compass and distance to the nearest part of the route. Tap it to temporarily zoom out far enough to see the route.
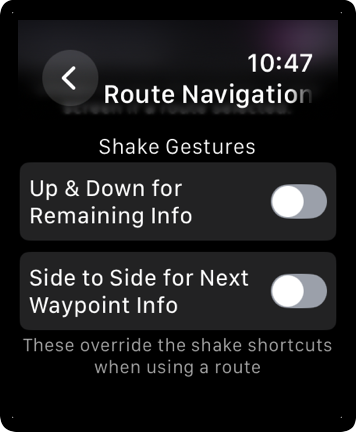
To hear remaining distance and ascent shake up & down. Or shake side-to-side to hear details about the next navigation waypoint. Both options are disabled by default.
Or you can configure the shake gestures to speak whatever you want in Settings / Commands / Shortcuts.

To change route settings before or during a workout go to Settings then tap Routes. Here you can deselect the current route, reverse it, or select a different route.
Tap Route Theme to change the colour scheme, line width, transparency etc.
This section describes the waypoints that can be included with a route. For details about general waypoints and navigating to a waypoint see the page on Waypoints.
Routes contain 3 types of waypoints:
- Navigation Waypoints (on the route)
- Other On-Route Waypoints
- Off-Route Waypoints
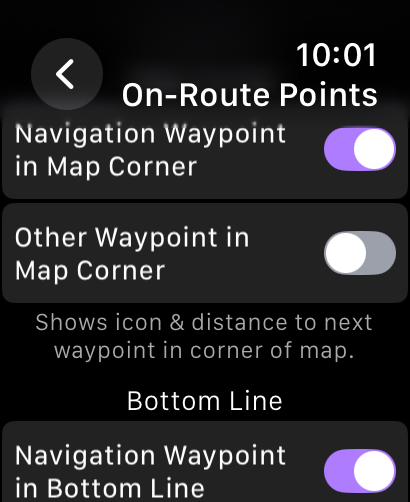
These waypoint types are treated differently according to your settings. For example by default the app will show the icon and distance to the next navigation waypoint in the corner of the map. It will also notify you when you are approaching and when you reach a navigation waypoint. Whereas other on-route waypoints are less prominent and by default you will only be informed when you reach one.
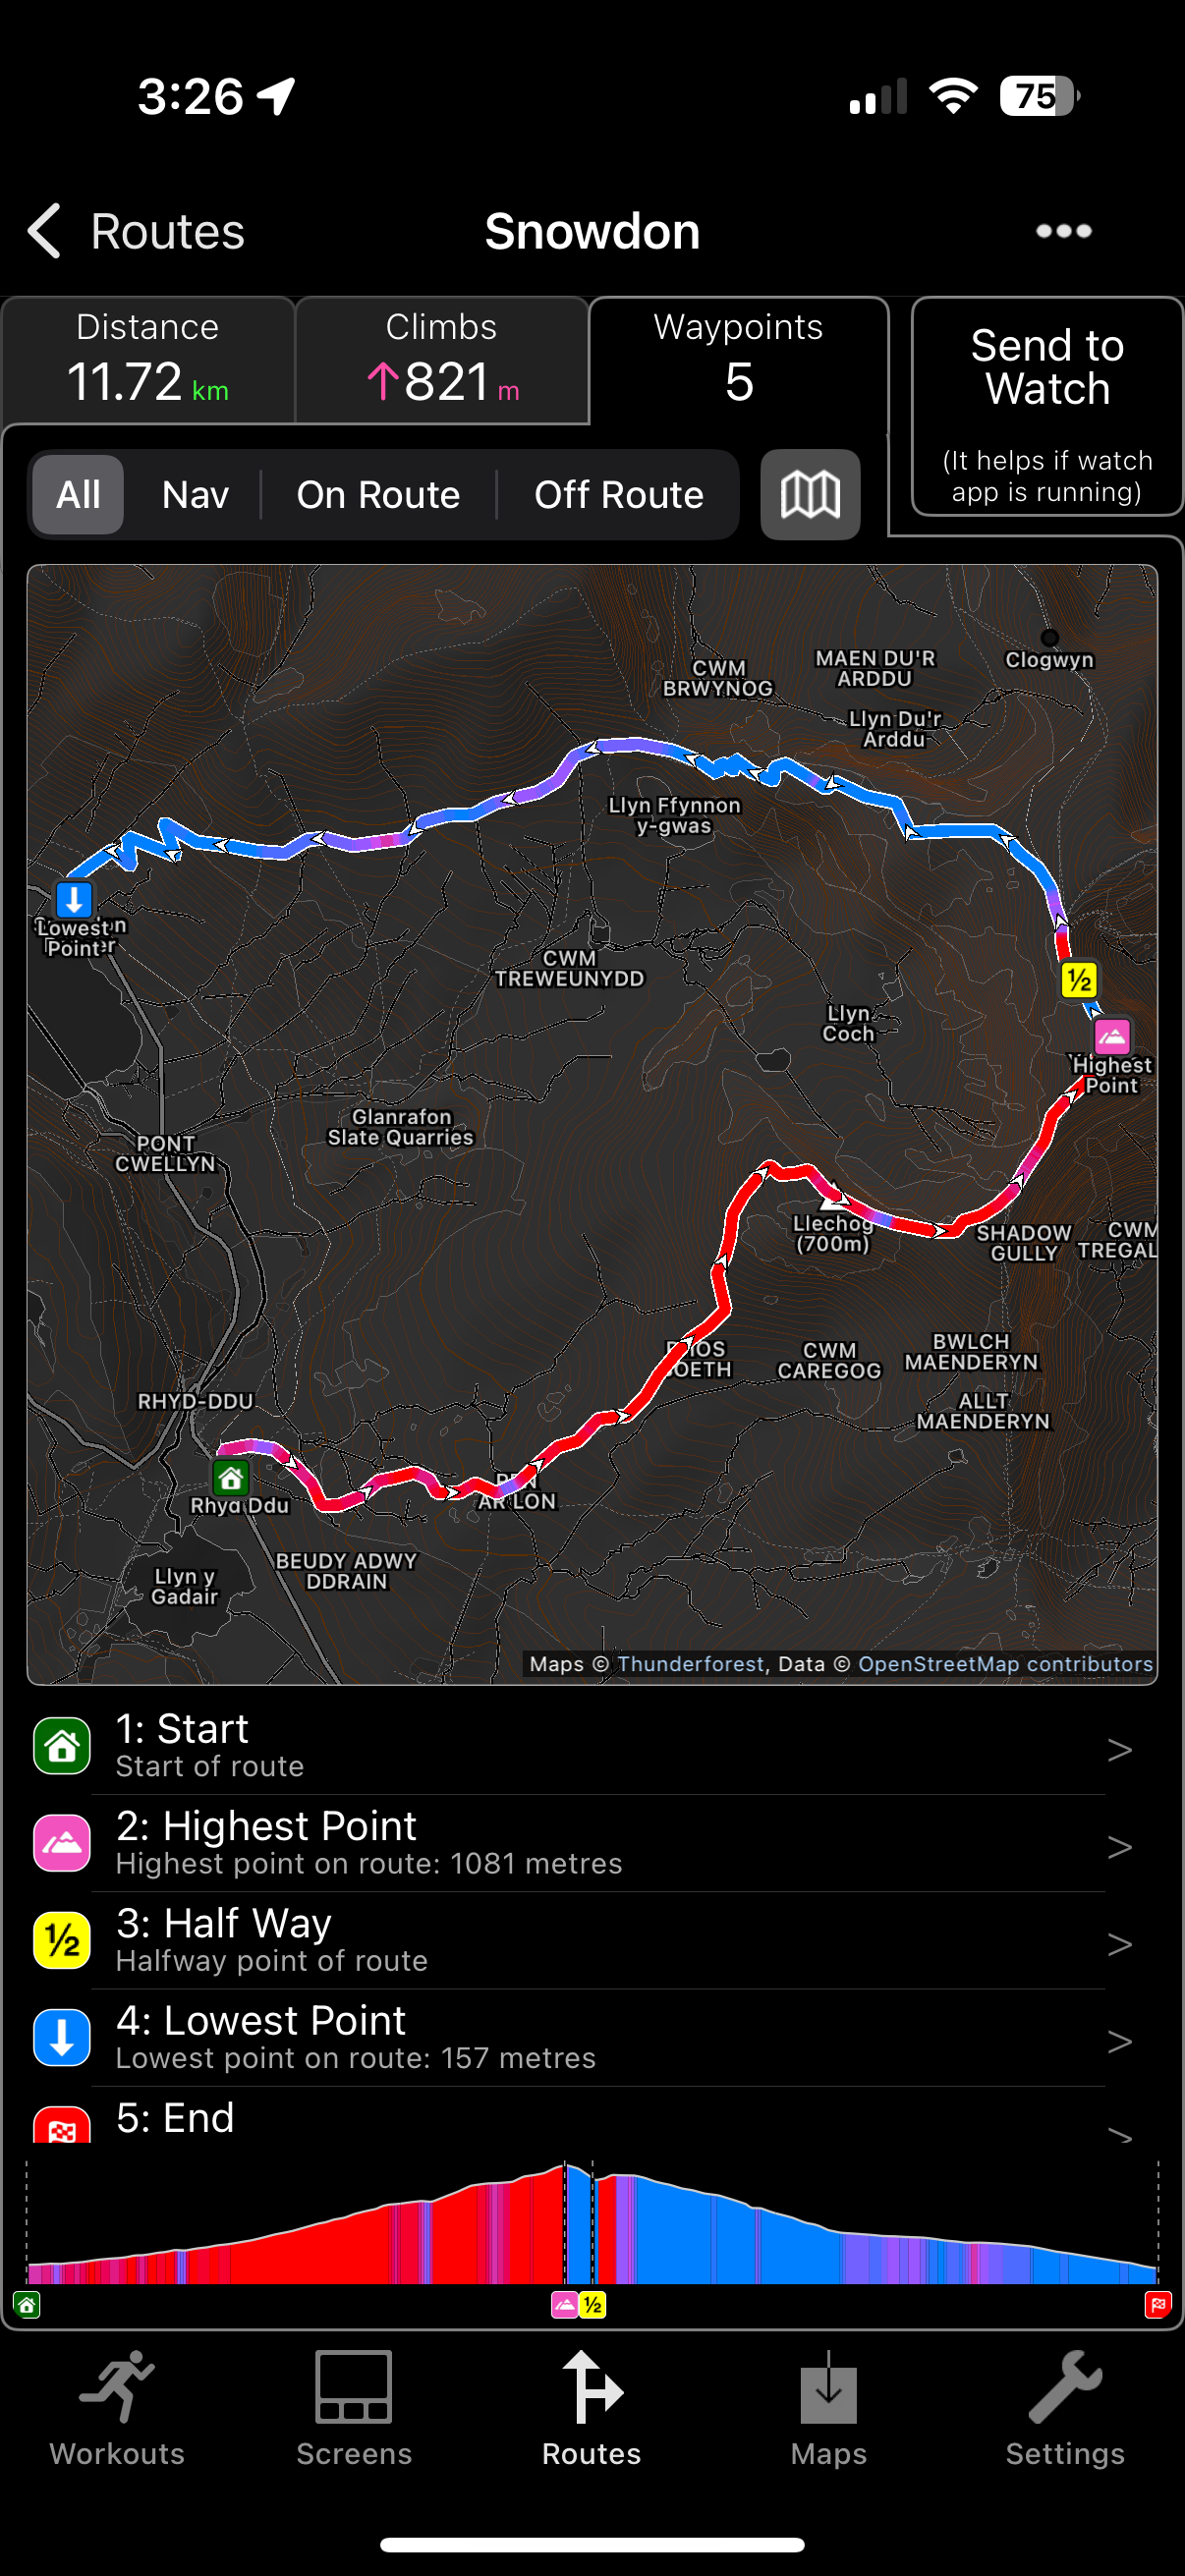
WorkOutDoors automatically creates 5 on-route waypoints: Start, Half Way, End, Highest Point and Lowest Point. Start and End are considered navigation waypoints, so by default the distance to the end will be shown in the bottom left of the map when it is the next waypoint (which will always be the case for routes with no other navigation waypoints).
For the best turn-by-turn directions make sure to load a file that was created by a system that includes them as waypoints. For example RideWithGPS or PlotARoute.
Make sure to configure the generating system to export a file that contains turn by turn directions (often called 'cues') as waypoints.
If a route does not contain turn by turn waypoints then the app will offer to create them by looking for sharp bends in the route.
Note: this is inferior to proper directions and can miss slight forks, large roundabouts etc. So it is much better to import a route from a source which includes direction waypoints.
You can also manually create and edit navigation or other waypoints. To do this touch the position on the screen that you want to create a waypoint. Then tap Add Navigation Waypoint on the menu that appears.
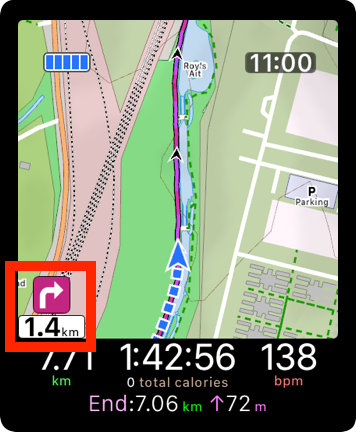
By default the icon and distance to the next waypoint are shown in the bottom left corner of the map. If there are no navigation waypoints then it shows the distance to the end of the route.
If you tap the icon then the map will zoom out to make the next waypoint visible.
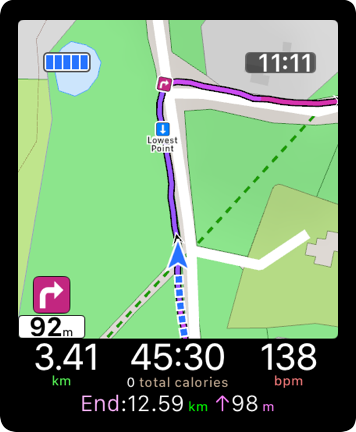
When you get within a configurable distance of the next waypoint then the app will alert you that you are approaching it.
By default it will also temporarily zoom in to make navigation easier.
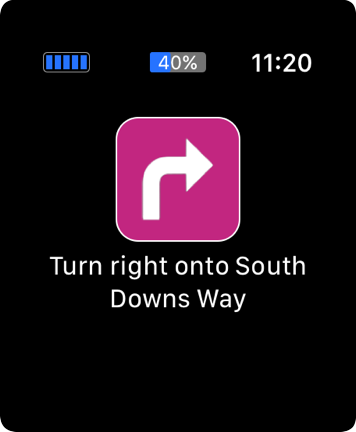
When you reach the waypoint then the app will also alert you.
You can also configure it to inform you when you are at the nearest point of the route to an off-route waypoint that was contained in the route.
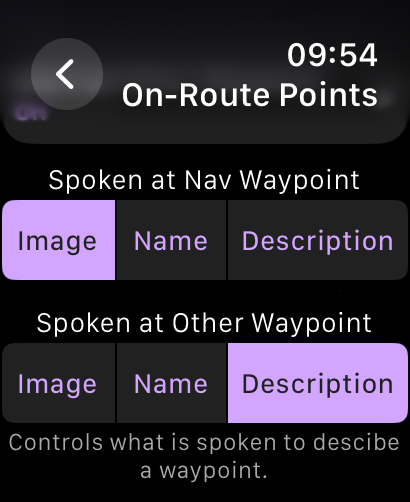
You can configure what aspect of the waypoint is spoken. By default the app only speaks the direction for navigation waypoints but you may want the name or description.
For example your route file may contain the street name to turn into in the waypoint description.
The app includes many configuration settings for route waypoints, so it is worth investigating them.
For example if your 'Other' (on-route but non-navigation) waypoints are as important to you as navigation waypoints then you can configure them accordingly.
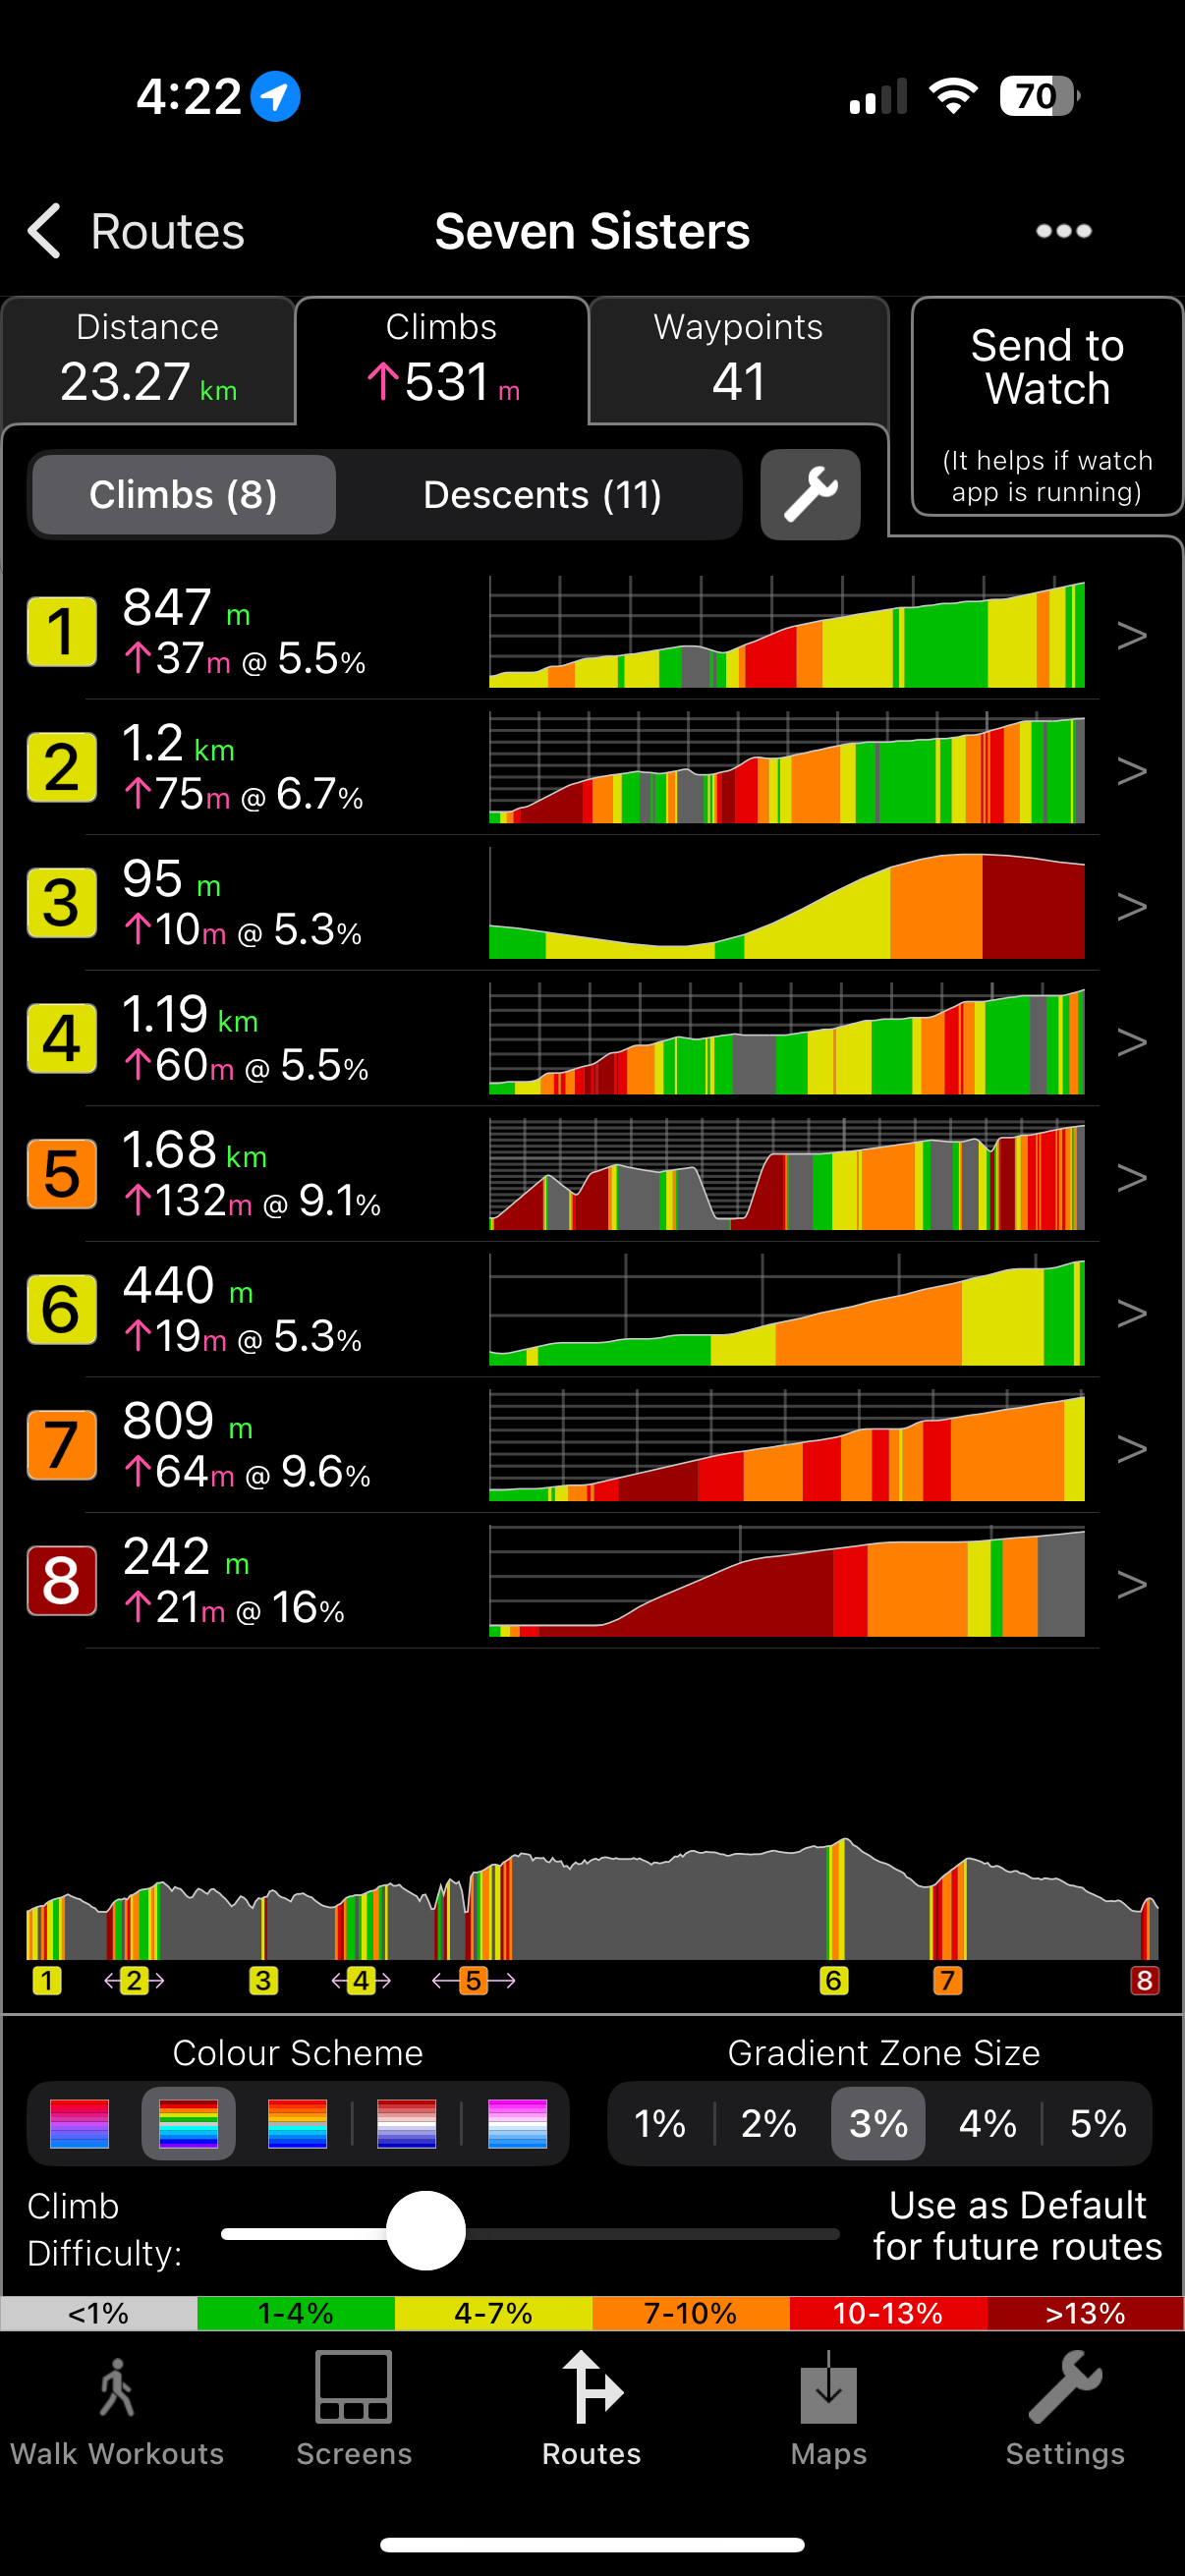
The app will detect both climbs and descents and show them on a map, in a list and along a profile.
By default during a workout it will only inform you of climbs but you can change this in the route settings.
Tap the Spanner to show settings such as the colour scheme and gradient zone size.
This will also change the screen to show a list of all the slopes instead of the map and a smaller list.
You can adjust the size of the gradient zones according to how steep the slopes are.
For example if your slopes all look very red then maybe use a larger zone size, but if they are all green then use a smaller size.
As with the other route tabs you can touch a position on the map for a second and a context menu will appear.
Touch a slope to edit or delete it. Or touch a steep part of the route without a slope and you will have the option to add a slope there.
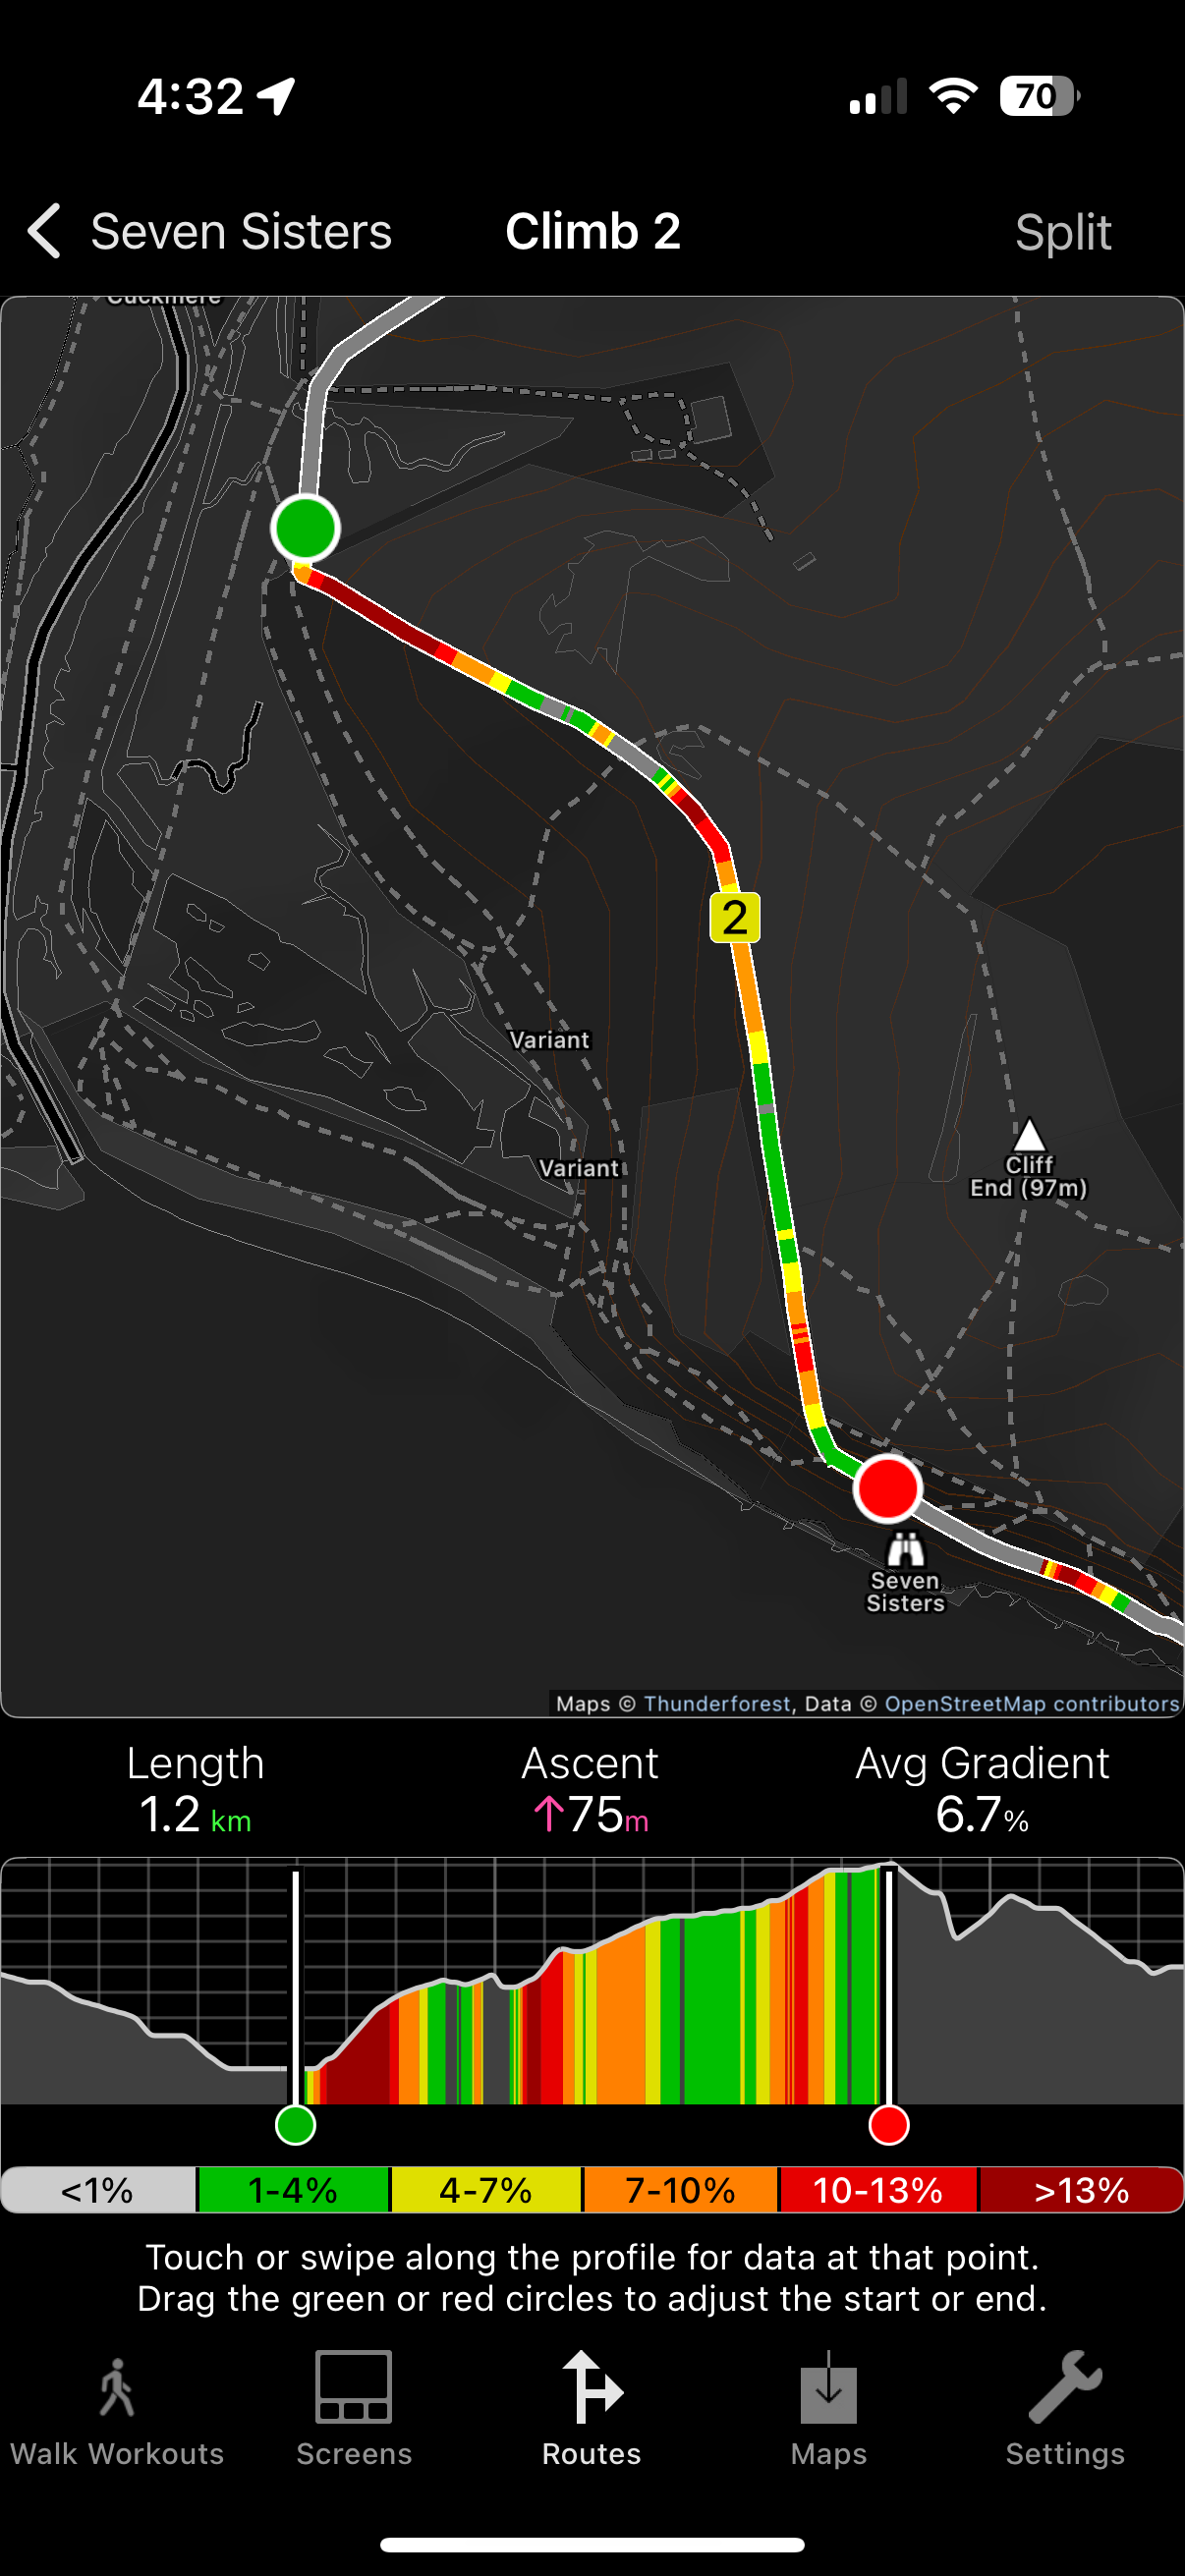
To edit a slope tap it in the list or on the map and a screen will appear that is focussed on that slope.
As with other screens you can move your finger along the profile to see the distance, elevation and gradient at each point.
To fine tune the positions of the start and end of the slope move the red and green markers on the profile.
Tap the Split button to split the slope into two separate slopes. To join a slope with a nearby slope move the red or green marker towards the other slope.
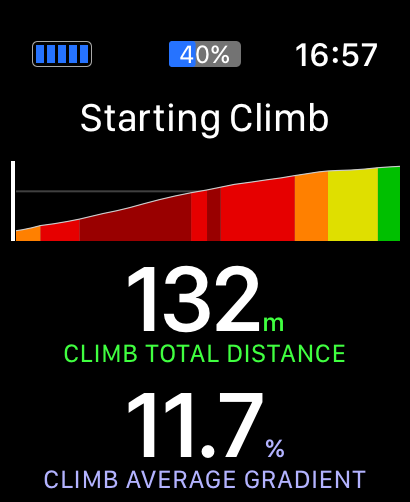
The watch app alerts you at the start of a climb or descent. By default this shows and speaks the length and gradient of the slope. However this can be changed in the settings.
At the end of a climb or descent the app informs the user of the time taken to complete the slope.
During a climb the app shows the climb screen, which can be configured in the settings.
This does not happen by default for descents but that can also be enabled and configured in the settings.
Email us for more information, or check out our Press Kit or our Privacy Policy.